Welcome to the complete
We noticed during our conversion that there was no to limited available information on how a single person or family built out their school bus conversion, and that’s why I created this list. If you’ve seen our skoolie walkthrough tour and think “oh, that’s a cute shampoo holder” or “I wonder what size mini-split AC they bought for a 40 foot bus,” then we’ve got it listed here for your convenience.
Our tiny home on wheels took seven months to build out for our family of five between 2020 to 2021. We purchased 90% of our supplies on Amazon, 8% came from the big-box stores like The Home Depot and Lowe’s, 1% came from our special order off-grid appliances (fridge and range) and lithium batteries, and the remaining 1% came from local specialty stores like plumbing and gas supply stores.
This is a long blog post so I’ve included a handy table of contents below that will take you to the section you need. If you need to navigate back to the top of the article, click the arrow in the bottom right-hand corner.

Plumbing

These are the products we used to run our water supply lines (including pump), sewer lines, hot water heater, fresh and gray water tanks, compost toilet, and water filtration, and the finishes in our bathroom and kitchen in our school bus conversion.
Read the detailed guide on our skoolie plumbing system here.
Water supply
We used a flexible pex tubing to run our water supply lines, and we’ve been very happy with the ease of installation and ease of repair, if and when that occurs.
I highly recommend drawing out a floorplan of your rig and its plumbing system to find any obstacles before you begin cutting holes.
 Class A Customs | T-10000 | One (1) RV Fresh Water 100 Gallon Tank, Grey Water | Ribbed for Extra Support
 SharkBite 1/2 Inch x 100 Feet Red PEX-B, PEX Pipe Flexible Water Tubing for Plumbing, U860R100
 SharkBite 1/2 Inch x 100 Feet Blue PEX-B, PEX Pipe Flexible Water Tubing for Plumbing, U806B100
 Delta Faucet R10000-UNBXHF MultiChoice Universal Shower Valve Body for Shower Faucet Trim Kits
 Feelers 1/4" One Way Inline Check Valve Non-Return One-Way Air Water Gas Check Valve Ozone Resistance PVDF, Pack of 4
 iCrimp F1807 PEX Crimper, Copper Pipe Crimping Tool Kit with 3/8'', 1/2'', 3/4'', 1'' Quick Change Jaws, PEX Tubing Cutter, Go/No-Go Gauge, Copper Ring PEX Remo...
 120PCS 5 Sizes PEX Clamps Kit with Plier, 1/2'', 3/4'', 3/8 , 5/8'', 1'', Premium 304 Stainless Steel Cinch Crimp Rings, PEX Tool Kit Assortment for PEX Tubing ...
 SharkBite 1/2 Inch Check Valve, Push to Connect Brass Plumbing Fitting, PEX Pipe, Copper, CPVC, PE-RT, HDPE, U2008-0000LFA
 KIPA RV City water Fill inlet flange brass RV water hookup Connector FPT 1/2" Female thread 3" Flange white, With check valve backflow preventer in city water connection
 3/4" Pex Fittings, SUNGATOR 36 PCS Pex Fittings 3/4 Inch Set, 12 Each Elbow Tee Coupling 3/4" Pex Fittings for Pex Pipe, No Lead Brass, ASTM F1807
Water quality
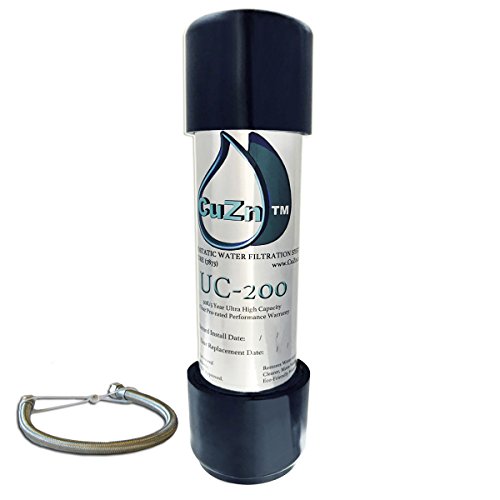
Clean drinking water is imperative in an RV. Unfortunately, you often don’t know what quality of water you’re bringing into your fresh water tank and to the drinking faucet. We filter our water flowing into our fresh water tank using an in-line RV filter that simply connects to the hose. Additionally, we purchased a multistage water filter that installed in a few minutes underneath our kitchen sink – the “drinking faucet.”
These are the products that we used in our
- the exterior water source
- the drinking water coming from the kitchen sink.
- Bonus: A metal filtered water bottle for when you’re on the go!
Hot water heater
We installed on a ventless, tankless liquid-propane gas hot water heater and have been very satisfied with it.
Read the full review of this water heater in this blog.
Water tanks
If you’re not sure what size fresh water tank you need for your family, read this blog. If you’re wondering what size gray water tank is right for your build, then this blog answers that for you.
Sewer
These are the plumbing parts and supplies that we used to install the sewer system in our
 Midline Valve PVC Inline Check Valve for Backflow Prevention 1-1/2'' Solvent Connections White Plastic (4I2T112)
 Westbrass D206P-62 4-1/2" OD Shower Drain Assembly and Grid Strainer Cover fits both Sch. 40 PVC & ABS Pipes, Matte Black
Kitchen and bathroom finishes
We all love good-looking and functional kitchens and bathrooms, especially when living tiny. Here is a list of items we used to finish our skoolie kitchen and bathroom, specific to plumbing.
If you’re unsure where to start when tiling your
Compost Toilet
These are the products that we used to build our compost toilet in our school bus conversion.
This is a personal preference but seeing our solids even with the coconut coir and a toilet seat isn’t a first choice in an expensive remodel. Instead, it would have been nicer to have an all-in-one system that was still diverting urine but looked a bit more like a toilet.
| Product Image | Product Name / Primary Rating / Price | Primary Button |
|---|---|---|
|
||
|
Liquid propane gas
We installed black pipe for our exterior gas lines that ran under the bus. We secured them to the metal frame with metal zip ties. The fittings listed below reflect the shape and size of the products we used; however, they are not an exact match. We recommend you visit a plumbing or gas supply shop for these products.
Appliances
We purchased a 20″ propane range from Unique Appliances, which is made for off-grid applications. The one listed here is not the same unit, but a similar size and style.
Gas supply
 Skyflame Stainless Steel Venting Panel for Masonry Fire Pits/Fireplaces and Outdoor Kitchens 15-Inch by 6-1/2-Inch
 NQN Upgraded 18 Feet High Pressure Braided Propane Hose Extension with Conversion Coupling 3/8" Flare to 1/2" Female NPT, 1/4" Male NPT, 3/8" Male NPT, 3/8" Male Flare for BBQ...
 Camco Propane Double-Stage Auto-Changeover Regulator | Features Auto Switch Over from Empty to Full Propane Tank | Ideal for Refilling Propane Supplies for RVing, Camping, Grilling, and More (59005)
 Aolemi Stainless Steel Pipe Fitting Union 1/2 Inch NPT Female x NPT 1/2 Female Fitting Threads Adapter 1 Piece
 uxcell Pipe Fitting 45 Degree Elbow 1/2 NPT Female Thread Hose Connector Adapter, 304 Stainless Steel Pack of 2
 Beduan Stainless Steel Cast Pipe Fittings, 90 Degree Street Elbow 1/2" NPT Male x 1/2" NPT Female Water Fuel Air
 Beduan Stainless Steel Pipe Fittings, 1/2" NPT x 1/2" NPT Male Threaded, 16" Length Nipple Cast Pipe
 EZ-Fluid 24" Stainless Steel Corrugated Yellow Epoxy Coated 1/2" MIP x 1/2" FIP Gas Flex,Flexible Natural Gas Connector Hose Supply Line For Gas Pipe,Hot Water Heater,Range,Dryer,Stove(...
 Beduan 1/2" Tee Female NPT T Shaped 3 Way Cast Pipe Fitting - Stainless Steel 304 (Pack of 2)
Safety
Air conditioning
-
 Buy Now$788.00
We earn a commission if you make a purchase, at no additional cost to you.
11/21/2024 12:53 pm GMT
Solar Array

My husband estimates we spent between $10,000 to $12,000 on our solar array, which is not a small chunk of change, and it allowed us to easily live off-grid with solar power for electricity (and propane for cooking).
After we calculated how much energy we use in our energy audit, we followed the diagrams from Explorist.life to help us find a solar array that worked for our family of five living full-time in the bus.
We ultimately purchased the interior solar array elements like lithium batteries and inverter through Battleborn directly during a “cyber Monday” or “returns Wednesday” sale around Thanksgiving, and saved a little money there, and the exterior solar array elements like the panels from Amazon.
Being safe was of huge importance to us in this rig since our family would be living in it. My husband consulted with and hired three different electricians to review his work on solar and the 12V and 110V electrical systems. We recommend you hire professionals too! He spent at least 2 weeks prior to starting diving deep into electrical, solar set-ups, etc, and then purchasing the products for each system. He then spent close to one month learning how to install everything correctly.
Solar panels
 BougeRV 8 Units Solar Panel Mounting z Bracket, Supporting for RV, Roof, Boat, Off Grid, 2 Set of 4 Units
Interior array
 Victron Energy MultiPlus 3000VA 12-Volt Pure Sine Wave Inverter and 120 amp Battery Charger, UL-Certified
Battery bank
 Baomain AWG 2/35.0mm² Wire Copper Crimp Connector Insulated Ferrule Pin Cord End Terminal Red E35-16 Pack of 50
 TEMCo Hammer Lug Crimper Tool - Crimps 8 AWG to 4/0 Battery & Welding Cables (Workbench-Mountable)
 REAL STEEL 0508 Rubber Grip Forged Jacketed Graphite Drilling Sledge Hammer for Striking 3 lb
General Solar Supplies
 AstroAI Digital Multimeter and Analyzer TRMS 6000 Counts Volt Meter Ohmmeter Auto-Ranging Tester; Accurately Measures Voltage Current Resistance Diodes Continuity Duty-Cycle Capacitance Temperature
Electrical

Electrical and solar were the most complex systems my husband had to learn in order to build our mobile dwelling. He spent weeks leading up to the installation just researching and learning everything he could. He consulted with licensed electricians in our personal network and specialists within electrical and solar that have worked with skoolies or a mobile application before.
Additionally, my husband had licensed electricians perform inspections at the rough-in and final stages of our build. Having safe and sound electrical is paramount when living in any home, especially a mobile dwelling.
Below, you’ll find the products we used in our 110V and 12V electrical arrays. Check in the solar section of this article for products in that category.
We highly encourage you to budget for electrical and solar consultations and inspections.
General electrical supplies
12V power supply
 Qibaok 340 PCS Heat Shrink Butt Connectors Waterproof Electrical Wire Connectors Insulated Automotive Butt Connectors
 Baomain Insulated Fork Spade Wire Connector Electrical Crimp Terminal 14-16AWG(1.5-2.5 mmq) USA #8 Pack of 100
 10/3 AWG UL 1426 (The Real Thing) Triplex Flat Marine Wire - Tinned Copper Boat Cable - 30 Feet - White PVC Jacket
 IGLORY 100 Pcs T-tap Wire Connectors, Electrical T Connector, Wire Splicers Quick Splice,18~14 Awg Splice Wire Connector
 TICONN 400 Pcs Nylon Spade Quick Disconnect Connectors Kit, Electrical Insulated Terminals, Male and Female Spade Wire Crimp Terminal Assortment Kit
 Qibaok 340 PCS Heat Shrink Butt Connectors Waterproof Electrical Wire Connectors Insulated Automotive Butt Connectors
 InstallGear 180pc Assorted Rubber Grommet Kit - 8 Sizes (1/4", 5/16", 3/8", 7/16", 1/2", 5/8", 7/8", 1") | Car Grommet Kit Assortment Rubber Wire Grommets for W...
 XHF 1/2 Inch (13mm) 3:1 Waterproof Heat Shrink Tubing Marine Grade Wire Cable Adhesive Lined Tube Insulation Seal Against Moisture Corrosion and Air Leakage, 4 Ft Black
 TEMCo INDUSTRIAL WC0451-80' (40' Blk, 40' Red) 6 Gauge AWG Welding Lead & Car Battery Cable Copper Wire Black + RED | Made in USA
 Baomain AWG 10/6.0mm² Long: 12mm Wire Copper Crimp Connector Non Insulated Ferrule Pin Cord End Terminal EN6012mm Pack of 100
 6 Gauge 3 Conductor Electrical Wire - 13 ft Triplex Flat Marine Grade Wire Tinned Copper Oxygen-Free Insulated - 6/3 AWG UL 1426 Standard PVC Wire for Boat, Automotive, Speakers, Camper & Trailers
 Baomain AWG 6 / 16mm² 5/8" Long: 18mm Wire Copper Crimp Connector Non Insulated Ferrule Pin Cord End Terminal EN16-18mm Pack of 100
 SELTERM 10pcs 4/0 AWG-5/16" Stud Tinned Copper Wire Lugs, Heavy Duty Battery Cable Ends,0000 Gauge Ring Terminals, UL Battery Lugs Marine Grade Copper Eyelets Electrical Battery Terminal Connecto...
 XHF 3/4 Inch (19mm) 3:1 Waterproof Heat Shrink Tubing Marine Grade Wire Cable Adhesive Lined Tube Insulation Seal Against Moisture Corrosion and Air Leakage, 4 Ft Black 1/0, 2/0, 3/0, 4/0 Wire
 Bay Marine Supply MRBF Terminal Fuse Block Kit (Fuse Included) Single Stud 5/16" (M8) Compact Marine Rated Battery Fuse 060A
 XHF 1/2 Inch (13mm) 3:1 Waterproof Heat Shrink Tubing Marine Grade Wire Cable Adhesive Lined Tube Insulation Seal Against Moisture Corrosion and Air Leakage, 4 Ft Red
 TEMCo WC0325-20 ft 4/0 Gauge AWG Welding Lead & Car Battery Cable Copper Wire RED | Made in USA
 TEMCo WC0324-15 ft 4/0 Gauge AWG Welding Lead & Car Battery Cable Copper Wire RED | Made in USA
 Wirefy T Tap Wire Connectors Kit - Electrical Connectors Kit - Spade Terminals - Quick Splice Disconnect Wire Taps - (120 PCS 22-10 AWG)
 Wirefy Heat Shrink Tubing Kit - 3:1 Ratio Adhesive Lined, Marine Grade Shrink Wrap - Automotive Industrial Heat-Shrink Tubing - Black, Red, White, Clear, Blue - 275 PCS
 IRWIN VISE-GRIP Wire Stripping Tool / Wire Cutter, 8 inch, Cuts 10-22 AWG, ProTouch Grip (2078309)
 Baomain Insulated Fork Spade Wire Connector Electrical Crimp Terminal 14-16AWG(1.5-2.5 mmq) USA #8 Pack of 100
12V lighting
 American Technology Components Triple SPST On-Off Switch with Bezel, 12-Volt, for RV, Trailer, Camper (White)
12V accessories
110V power supply
![Electrical Wire 10 AWG 10 Gauge Silicone Wire Hook Up Wire Cables 20 Feet [10 ft Black and 10 ft Red] Soft and Flexible 1050 Strands 0.08 mm of Tinned Copper Wire High Temperature Resistance](https://m.media-amazon.com/images/I/51CFOxcbz5L._SL500_.jpg) Electrical Wire 10 AWG 10 Gauge Silicone Wire Hook Up Wire Cables 20 Feet [10 ft Black and 10 ft Red] Soft and Flexible 1050 Strands 0.08 mm of Tinned Copper Wire High Temperature Resistance
Electrical Wire 10 AWG 10 Gauge Silicone Wire Hook Up Wire Cables 20 Feet [10 ft Black and 10 ft Red] Soft and Flexible 1050 Strands 0.08 mm of Tinned Copper Wire High Temperature Resistance
 Square D - HOM1224L125PC Homeline Load Center with Cover, Gray, 125-Amp Convertible Main Lugs, 1-Phase, 12-Space 24-Circuit, Indoor, Plug-on Neutral Ready
 Kohree 125V 30 AMP RV Power Plug Twist Lock Inlet, RV Shore Power Inlet with 3 Stainless Steel Pins and Screws, White
 SELTERM 10pcs 6 AWG-5/16" Stud (Wide Pad) Tinned Copper Wire Lugs, Heavy Duty Battery Cable Ends,6 Gauge Ring Terminals, UL Battery Lugs Marine Grade Copper Eyelets Battery Terminal Connectors
 SELTERM 25pcs 4/0 AWG 5/16" Stud Marine Grade Tinned Copper Battery Cable Lugs, 0000 Gauge Ring Terminals, UL Wire Lugs Electrical Battery Cable Ends, Tinned Copper Lugs Battery Terminal Connecto...
 SELTERM 5pcs 4/0 AWG 3/8" Stud Tinned Copper Wire Lugs, Battery Lugs, Ring Terminals, Battery Cable Ends, 0000 Gauge Ring Terminal Connectors, UL Marine Grade Electrical Battery Terminal Connecto...
 Square D by Schneider Electric S106 Load Center Cover Replacement Screws, 6-Pack, No Size, Silver, 6 Count
110V outlets
110V shore power
Framing
The wood and sheet metal used in our framing and finishing came from either The Home Depot, Lowes and a local sheet metal company. As such, I won’t be listing out these supplies specifically since they were rather generic. Instead, I’ll list the supplies we used to assist in framing our school bus conversion such as tools, nails, etc.
Door
 RecPro RV Pleated Folding Door 24" x 75" | Camper Folding Door | Fifth Wheel Folding Door Tan
Flooring
Drilling into Bus Frame
Shower
 Custom Building Product Custom Building Product-WDG5-4 WDG5 5 lb Non-Sanded Tile Grout, 5-Pound, White|Whites
Skylight
 Dicor 501LSW-1 Epdm Self-Leveling Lap Sealant-10.3 Oz. Tube, White, 10.3 Fluid_Ounces (Packaging May Vary)
Window deletion
Rust Removal
 DEWALT 20V MAX Cordless Drill Driver, 1/2 Inch, 2 Speed, XR 2.0 Ah Battery and Charger Included (DCD777D1)
Insulation
We choose to insulate our rig and reduce thermal bridging with a few different products. We sandwiched thin ceramic fiber cloth insulation between the wood and metal bus frame.
When building the floors, we added rigid pink foam between the frames. Our subfloor and finished flooring were placed on top of that.
For the ceilings and walls, we insulated with a closed cell spray foam product (after the electrical and plumbing were installed).
Protective Gear
Sound Deadening

Paint
Read how to paint the exterior of a skoolie and how to paint a skoolie roof for detailed instructions on those projects.
Decal removal
 DEWALT 20V MAX Cordless Drill Driver, 1/2 Inch, 2 Speed, XR 2.0 Ah Battery and Charger Included (DCD777D1)
Prep for exterior body paint
 Trisodium Phosphate Heavy duty Degreaser - Savogran TSP Wall Cleaner Removes Grease Smoke Grime & Soot Stains Packed With Centaurus AZ Nitrile Gloves To Protect Your Skin 16oz (1 Pack)
 ITTAHO 12" Wide Floor Scrub Brush with Long Handle,Extendable Grout Cleaner Brush for Tile Floor,Deck,Patio,Marble,Garage,Kitchen,Bathroom,Extra Hand Grout Brush(Blue)
Exterior body paint
 Mister Rui-Foam Paint Roller, 4 Inch-8 Pack Paint Roller Kit, Complete 4" Mini Paint Roller Kit with Small Foam Paint Roller Covers, Frame, Tray, and Liner for Professional Painting Results
Roof paint
 ITTAHO 12" Wide Floor Scrub Brush with Long Handle,Extendable Grout Cleaner Brush for Tile Floor,Deck,Patio,Marble,Garage,Kitchen,Bathroom,Extra Hand Grout Brush(Blue)
Interior paint
 Rust-Oleum 1990502 Painter's Touch Latex Paint, Quart, Flat White 32 Fl Oz (1 Quarts Pack of 1)
 HomeRight C800971.A Super Finish Max, Includes 3 Brass Spray Tips, 3 Spray Patterns, Easy to Clean HVLP Paint Sprayer, Great for Furniture, Cabinets, Trim & More, Sprays Stains, Sealers & Late...
General
 SwiftGrip Disposable Nitrile Exam Gloves, 3-mil, Blue, Nitrile Gloves Disposable Latex Free, Medical Gloves, Cleaning Gloves, Food-Safe Rubber Gloves, Powder Free, Non-Sterile, 100-ct Box (Large)
Safety
Kitchen
Bunks
 Heavy Duty Cargo Net Stretchable, Universal Adjustable Elastic Truck Net with Hooks, Storage Mesh Organizer Bungee for Car, SUV, Truck
Detectors
 Natural Gas Detector, Plug-in Propane Natural Gas Leak Detector for Home Kitchen RV, Combustible&Explosive Gas Alarm for LPG, LNG, Methane
Child Safety
Accessories
Office Supplies
 InnoView Portable Monitor, 15.6 Inch FHD 1080P HDMI USB C Second External Monitor for Laptop, Desktop, MacBook, Phones, Tablet, PS5/4, Xbox, Switch, Built-in Speaker with Protective Case
 Apple AirPods Max Wireless Over-Ear Headphones, Active Noise Cancelling, Transparency Mode, Personalized Spatial Audio, Dolby Atmos, Bluetooth Headphones for iPhone Space Gray
 Apple iPad Pro 12.9-inch (6th Generation): with M2 chip, Liquid Retina XDR Display, 256GB, Wi-Fi 6E, 12MP front/12MP and 10MP Back Cameras, Face ID, All-Day Battery Life Space Gray
 GSRUAN Tablet Wall Mount, Suitable for 7 to 13 inch Tablet PCs, Homes, Classrooms, Medical Places, Business Black
Vehicle Maintenance
Amazon 2018 New Osram Chips 110W 5x7 Led Headlights 7x6 Led Sealed Beam Headlamp with High Low Beam H6054 6054 Led Headlight for Jeep Wrangler YJ Cherokee XJ H5054 H6054LL 6052 6053 2Pcs
Bathroom
 Soap Dispensers 250ml ABS Plastic Drill Free with Adhesive or Wall Mount with Screws Liquid Hand Soap Dispenser for Bathroom or Kitchen Gray
 Better Living Products Aviva Shower Dispenser 3, Shampoo and Soap Dispenser, 3 x 11 fl. oz. Satin Silver, 11.2" x 3.5" x 7"
Kitchen
 KESOL RustProof Sponge Holder Caddy for Kitchen, Stainless Steel Organizer, Brush Holder, 304 Accessories, Suction Cup + Adhesive
 Primula Today Aluminum Stove Top Percolator Maker Durable, Brew Coffee On Stovetop, 9 Cup, Silver
Living Room
 Amazon Fire TV 43" 4-Series 4K UHD smart TV with Fire TV Alexa Voice Remote, stream live TV without cable
 Galphi 3 Channel Dash Cam Front and Rear Inside, 1080P Dash Camera for Cars, Dashcam Three Way Triple Car Camera with IR Night Vision, Loop Recording, G-Sensor, 24 Hours Recording, Support 128 GB Max
 HOME VISION TV Wall Mount for 26-65 inch LED LCD OLED 4K TV up to 132lbs, TV Mount Full Motion Swivel Tilt with Articulating Dual Arms TV Bracket Max VESA 400x400mm, Fits 12/16 inch Wood Stud
![GPS Suction Cup Mount for Garmin [Quick Extension Arm], Replacement GPS Dash Ball Mount Dashboard Windshield Car Holder for Garmin Nuvi Dezl Drive Drivesmart Zumo Driveassist DriveLuxe StreetPilot RV](https://m.media-amazon.com/images/I/51FQr4+ofaL._SL500_.jpg) GPS Suction Cup Mount for Garmin [Quick Extension Arm], Replacement GPS Dash Ball Mount Dashboard Windshield Car Holder for Garmin Nuvi Dezl Drive Drivesmart Zumo Driveassist DriveLuxe StreetPilot RV
GPS Suction Cup Mount for Garmin [Quick Extension Arm], Replacement GPS Dash Ball Mount Dashboard Windshield Car Holder for Garmin Nuvi Dezl Drive Drivesmart Zumo Driveassist DriveLuxe StreetPilot RV
 Garmin DezlCam 785 LMT-S: Advanced 7-inch GPS Truck Navigator with Built-in Dashboard Camera (Renewed)
![APPS2Car 13'' Gooseneck Car Phone Holder,Heavy Duty Phone Holder for Truck, [Flexibile Long Arm] [Anti shake stabilizer]Windshield Car Phone Mount Suction Cup,Fit For iPhone, Samsung &Ot...](https://m.media-amazon.com/images/I/41WJ6PEzhzS._SL500_.jpg) APPS2Car 13'' Gooseneck Car Phone Holder,Heavy Duty Phone Holder for Truck, [Flexibile Long Arm] [Anti shake stabilizer]Windshield Car Phone Mount Suction Cup,Fit For iPhone, Samsung &Ot...
APPS2Car 13'' Gooseneck Car Phone Holder,Heavy Duty Phone Holder for Truck, [Flexibile Long Arm] [Anti shake stabilizer]Windshield Car Phone Mount Suction Cup,Fit For iPhone, Samsung &Ot...
 Hokway Couch Cushion Covers Stretch Cushion Covers Sofa Seat Cushion Slipcover Cushion Protector(Black, Medium)
 FoamLove 4" H x 24" W x 72" L Upholstery Cushion Foam, Medium Density, Made for Body Comfort, Designed for Heavy Traffic and High Use Applications, Made in The USA
 Camco Camper/RV Drink Holder | Features Adjustable Space-Saving Design & Holds Almost Any Size Mug, Cup, Bottle or Can | Extra Cup Holder for Cars, Trucks, RVs, Vans, Boats, and More | White (4404...
 2pcs Recliner-Handles Cup Holder Replacement Insert Cup Holder for Couch for Sofa Boat Rv Couch Car Truck Poker Table(11 x 11 x 7cm)
 LeeKooLuu Wireless Backup Camera 5 Inch Rear View Monitor Kit HD 1080P Bluetooth Reverse Cameras for Truck Car Van Camper Two Channels Waterproof Night Vision DIY Parking Guide Lines LK2
 Wellgoods 1 Piece Small Black Spring Curtain Tension Rod Adjustable Extension Rod for Cupboard Bathroom Window Closet -15.7 to 27.5 Inches
 AMIR Upgraded Motion Sensor Light, Cordless Battery-Powered LED Night Light, Stick-Anywhere Closet Light Stair Lights, Wall Lights for Hallway, Bedroom, Kitchen (White - Pack of 6)
 Apalus Magnetic Screen Door, 36"x83" Strong Mesh, 28 Magnets from Top to Bottom Ultra Seal Magnets Close Automatically
Smart Lock
WiFi
AmazonEco-friendly Household Products
 STOUT by Envision E2430E85 EcoSafe-6400 Compostable Bags, 24" x 30", 13 gal capacity, 0.85 mil thickness, Green (Pack of 45)
 10 Pieces Swedish Kitchen Towels Reusable Sponge Cleaning Cloths Cactus Kitchen Cloths Absorbent Dish Cloth Washable Kitchen Towels for Kitchen Cleaning, 5 Styles
 Hello Activated Charcoal Teeth Whitening Eco Friendly Travel Toothpaste Tablets, Fresh Mint and Coconut Oil, Fluoride Free, Vegan, SLS Free, Gluten Free and TSA Compliant, 60 Tablets (Pack of 2)
Cleaning Supplies
 Collapsible Plastic Bucket with Handle - 2.6 Gallon (10L) Portable Cleaning Bucket Foldable Water Tub for Household Car Wash - Space Saving Outdoor Fishing, Garden, Camping Water Pail, 2 Pack
Tools
These are the tools we used during our school bus conversion that don’t fit into the above categories or deserve honorable mention.
Life after converting a skoolie
Now that our school bus conversion is complete, we’ve moved on to other projects like documenting the build itself. You can find many blogs related to our skoolie conversion here.
Was this blog helpful to you during your build? Let us know in the comments.
Disclosure: Some of the links in this article may be affiliate links, which can provide compensation to me at no cost to you if you decide to purchase a paid plan. Thank you, if you do. As an Amazon Associate I earn from qualifying purchases. This site is not intended to provide financial advice and is for entertainment only. Read our affiliate disclosure in our privacy policy.

















[…] is also something for everyone here. From fishing to hiking, shopping, dining (including fika), winter sports, music and even an amusement […]